Philippine eLib Portal
User Manual for Subscribed Users
Section 1 General Information
1.1 Project Overview
The Philippine eLib is a collaborative project of the National Library of the Philippines(NLP), University of the Philippines(UP), Department of Science and Technology(DOST), Department of Agriculture(DA), and the Commission on Higher Education(CHED).
Funded through the e-Government Fund of the Philippine Government, the project hopes to provide for the information needs of all sectors of society in a convenient, affordable, and efficient way of delivery.
The Philippine eLib Portal serves as the gateway to all the online resources and services of the Philippine eLib project. It aims to:
- provide access to the collection of the different participating institutions
- facilitate shared subscription to online resources;
- provide document delivery services;
- provide current contents services; and
- provide mechanism for fee services.
The eLib Portal consists of the following components and services:
- Union catalog (bibliographic data);
- Digitized materials (full-text documents);
- Document Delivery (downloads, courier services);
- Shared subscription (electronic databases);
- Alert services (SDI, email);
- Membership (partners, content builders, special collecting officers, individual members, institution members, prepaid card users); and
- Help System (online help, FAQs).
1.2 Purpose
This manual aims to inform the users of the Philippine eLib on the different functionalities of the eLib Portal system, how to navigate the different parts of the system, and how to maximize all available features.
1.3 Intended Readership
This manual is intended for all types of users, such as, Partners, Subscribers, Prepaid card users, and Guests.
Section 2 System Overview
The Philippine eLib Portal is a web-based system which serves as a gateway to all its products and services. It has the following major components:
- Union catalog – contains consolidated bibliographic records in Machine Readable Catalog (MARC) format from the different libraries of the partner institutions;
- Digitized materials – electronic copies of books, thesis, manuscripts, and other Filipiniana materials scanned from print or converted from microfilm and stored as digital images in Portable Document Format (PDF) files;
- Shared subscription – shared access to foreign electronic journals and databases currently subscribed to by the Philippine eLib;
- Membership – refers to the type of membership available for users of the Philippine eLib. Members are categorized as either Partners, Content Builders, Subscribers (individual or institution), or Pre-paid card users; and
- Cyber Selective Dissemination of Information (SDI) – an email-based alert service provided by the Philippine eLib to users subscribed to this service. In this service, a subscriber is informed, through email, on new resources available in the database that matches his/her selected categories.
Section 3 Getting Started
3.1 User Information
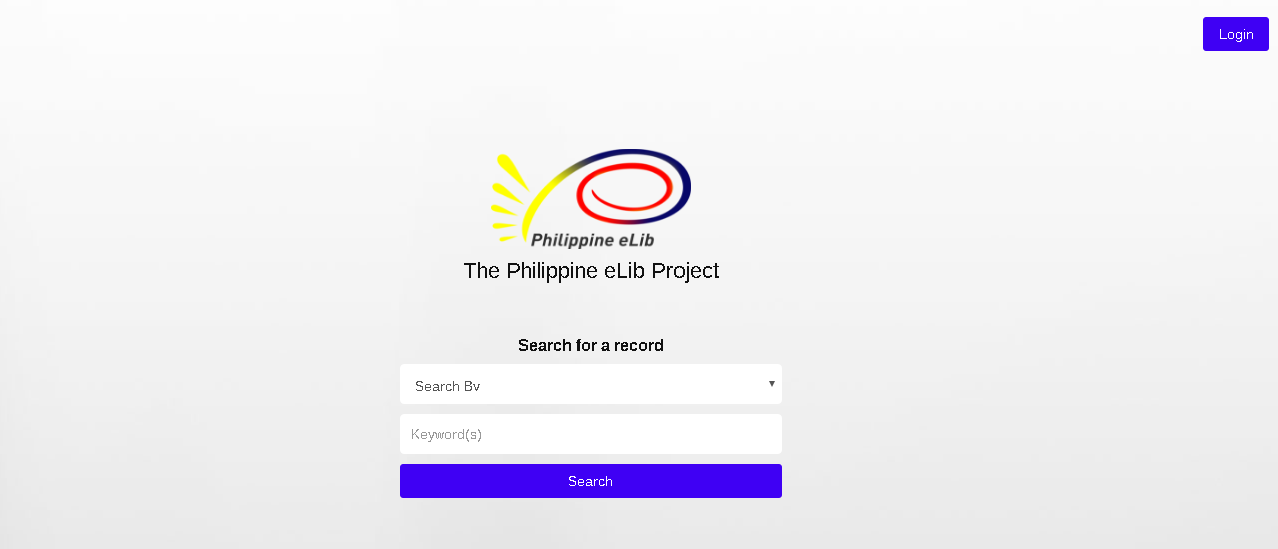
- To access Philippine eLib, open your web browser and type the server’s URL in the address bar (shown
3.2 Default Page
- This is where the user will be directed upon visiting the website.
Search Bar
3.3 Log In
3.3.1 Signing up
- Clicking the “Sign up button” will direct the user to the registration form where users will be prompted to enter their personal information as part of the registration. A guest(unsubscribed users) can not view and post questions and if a guest wants to buy books, the items that has been added to cart will not be saved, unlike with the subscribed users who can still view added-to-cart items.
3.3.2 Creating an Account
To register and create an account, proceed to the given steps below:
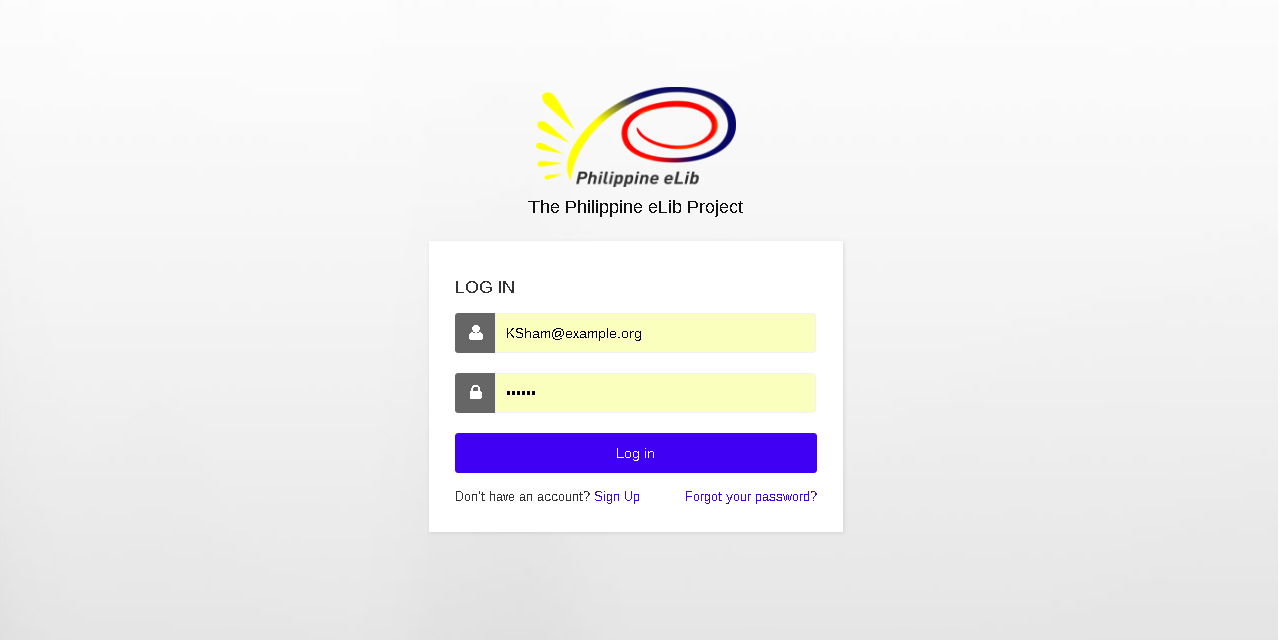
- Click “Log In button” in the upper right side of the page.
- From the Log in Page, click “Create Account button”, and the user will be directed to the filling up of form.
- Fill up the form, Enter the following information: Name, Middle Name, Last Name, Email, Postal Address, Phone, Fax, Username, and Password. The user will be asked to choose a type of account. As a subscribing user, click the “Choose user type” box and choose subscriber. The user will be prompted to choose the number of months they wanted to subscribe displayed with the amount they need to pay in order to begin using this website. Note that in order for your account to be activated you need to pay for the subscription before your account will be activated by the admin.
Section 4 Dashboard
4.1 Home Page
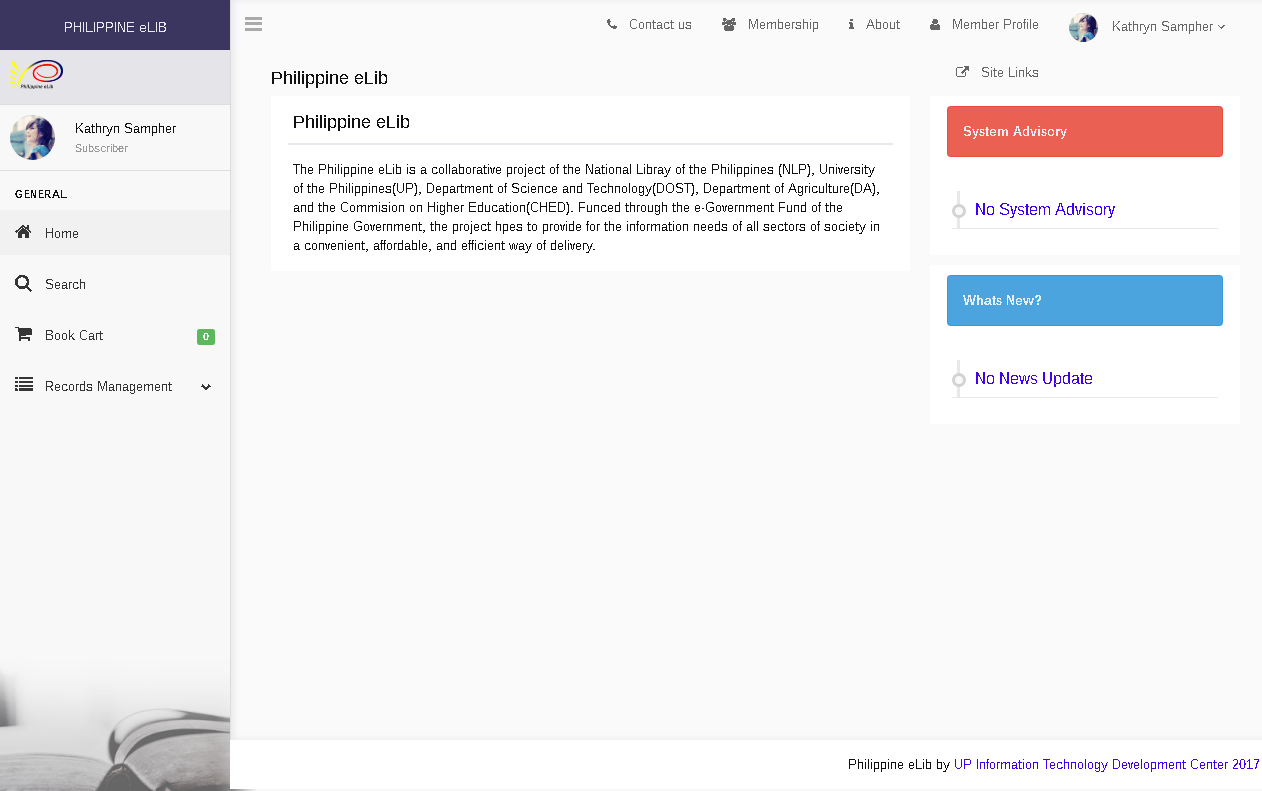
- This page lets the user know what this project is all about and the different organizations behind the success of this project. This page also informs users with the different advisories and news or updates that were released.
4.2 Search Page
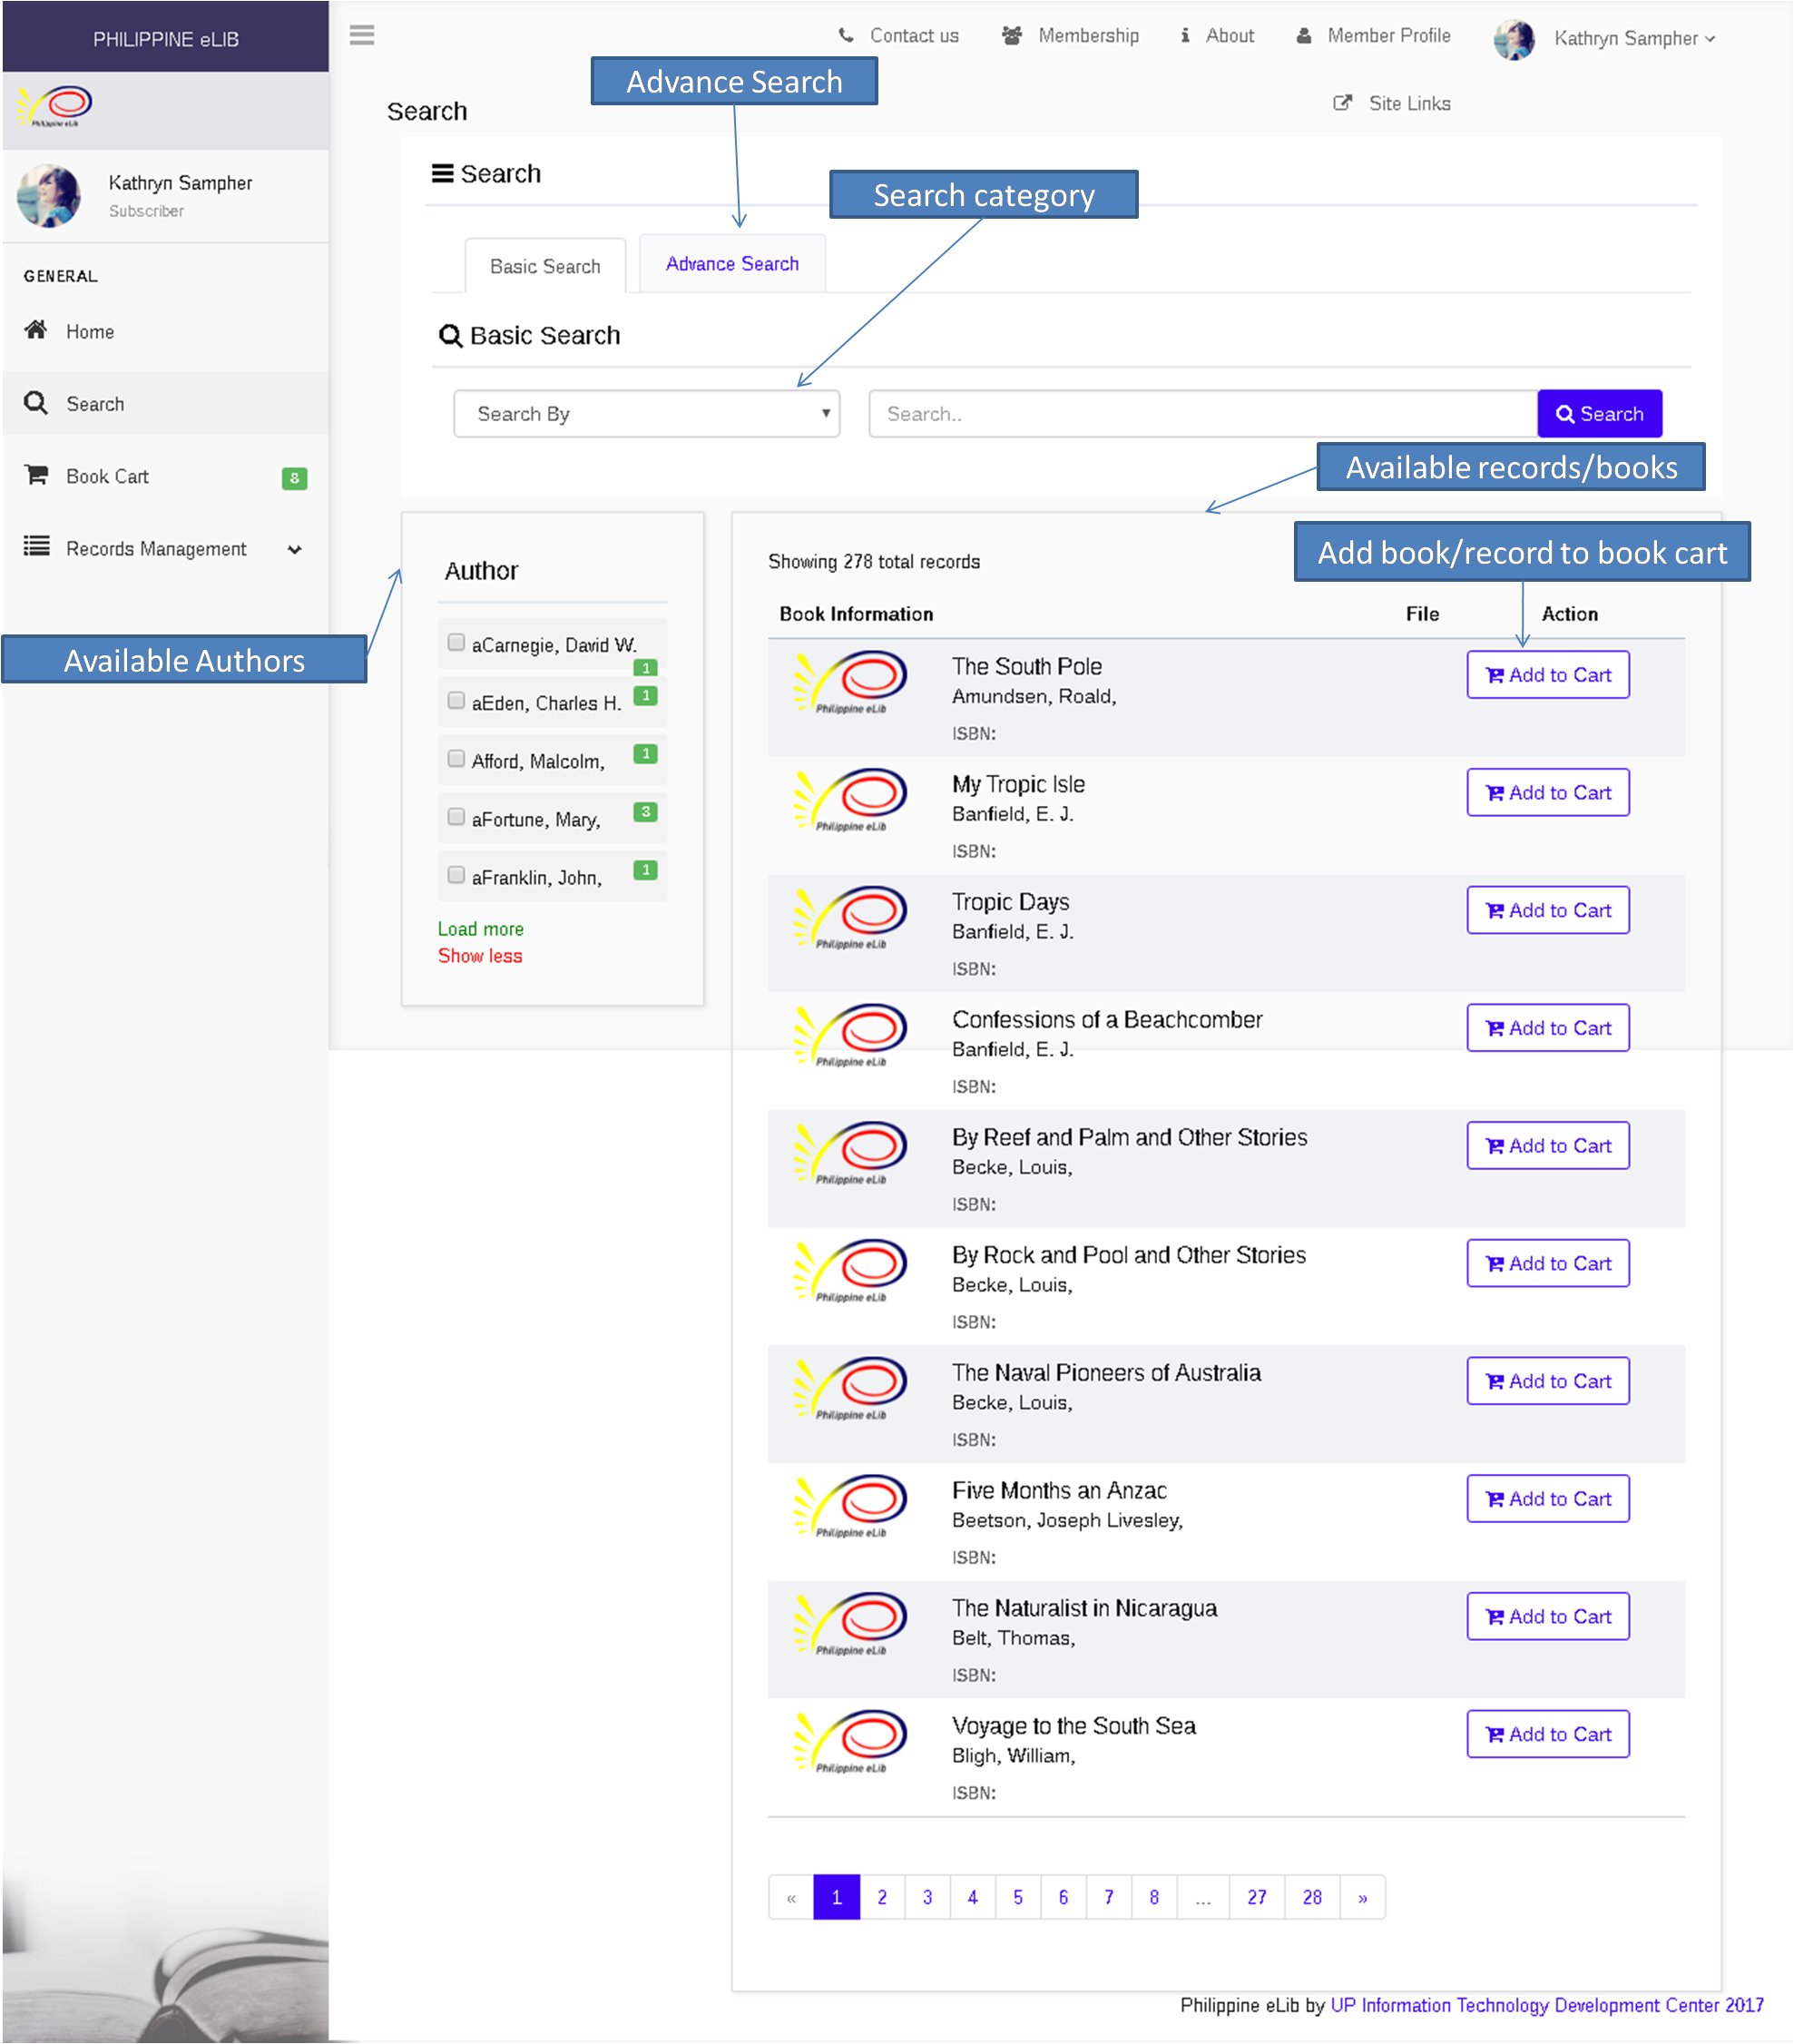
- This page allow users to search for books by providing different information such as “Author”,“Title”, “ISBN” or “ISNN”. This page also allow users to add books to personal book carts where copies of books can be purchased.
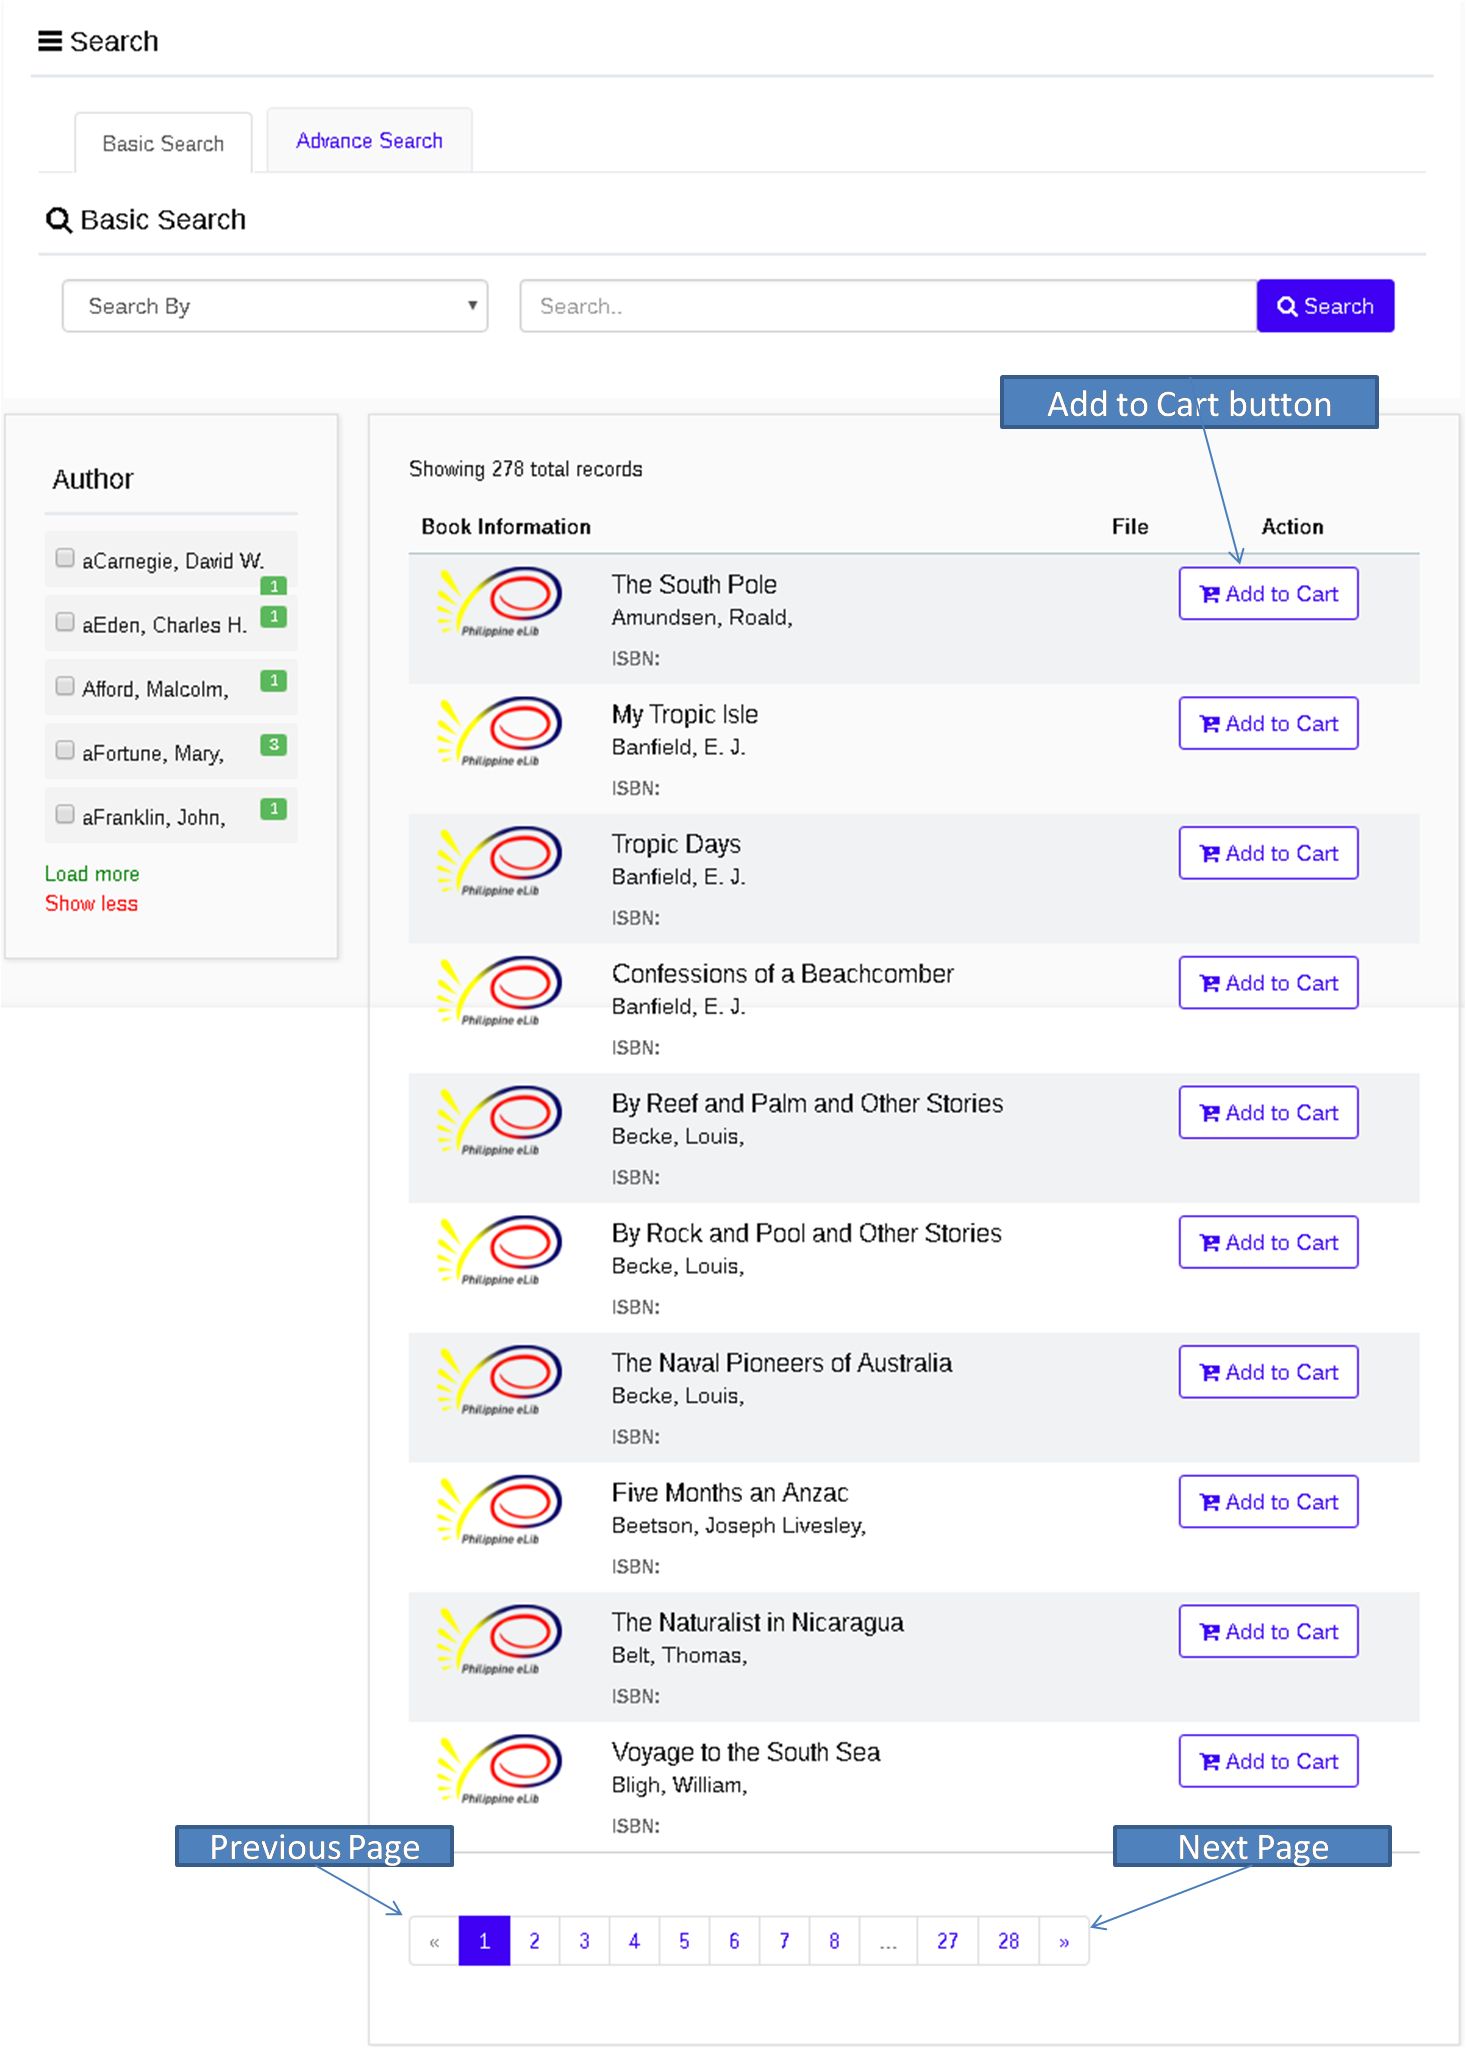
4.2.1 Basic Search
- To search for books, proceed with the following steps:
- Choose a search category by clicking “Search category”button. Users can search books by providing details depending on the chosen category: “Author”,“Title”, and “International Standard Serial number(ISSN)or International Standard Book Number(ISBN)”.
- Type the information available in the search bar depending on the chosen category.
- Click “Search”button
4.2.2 Advance Search
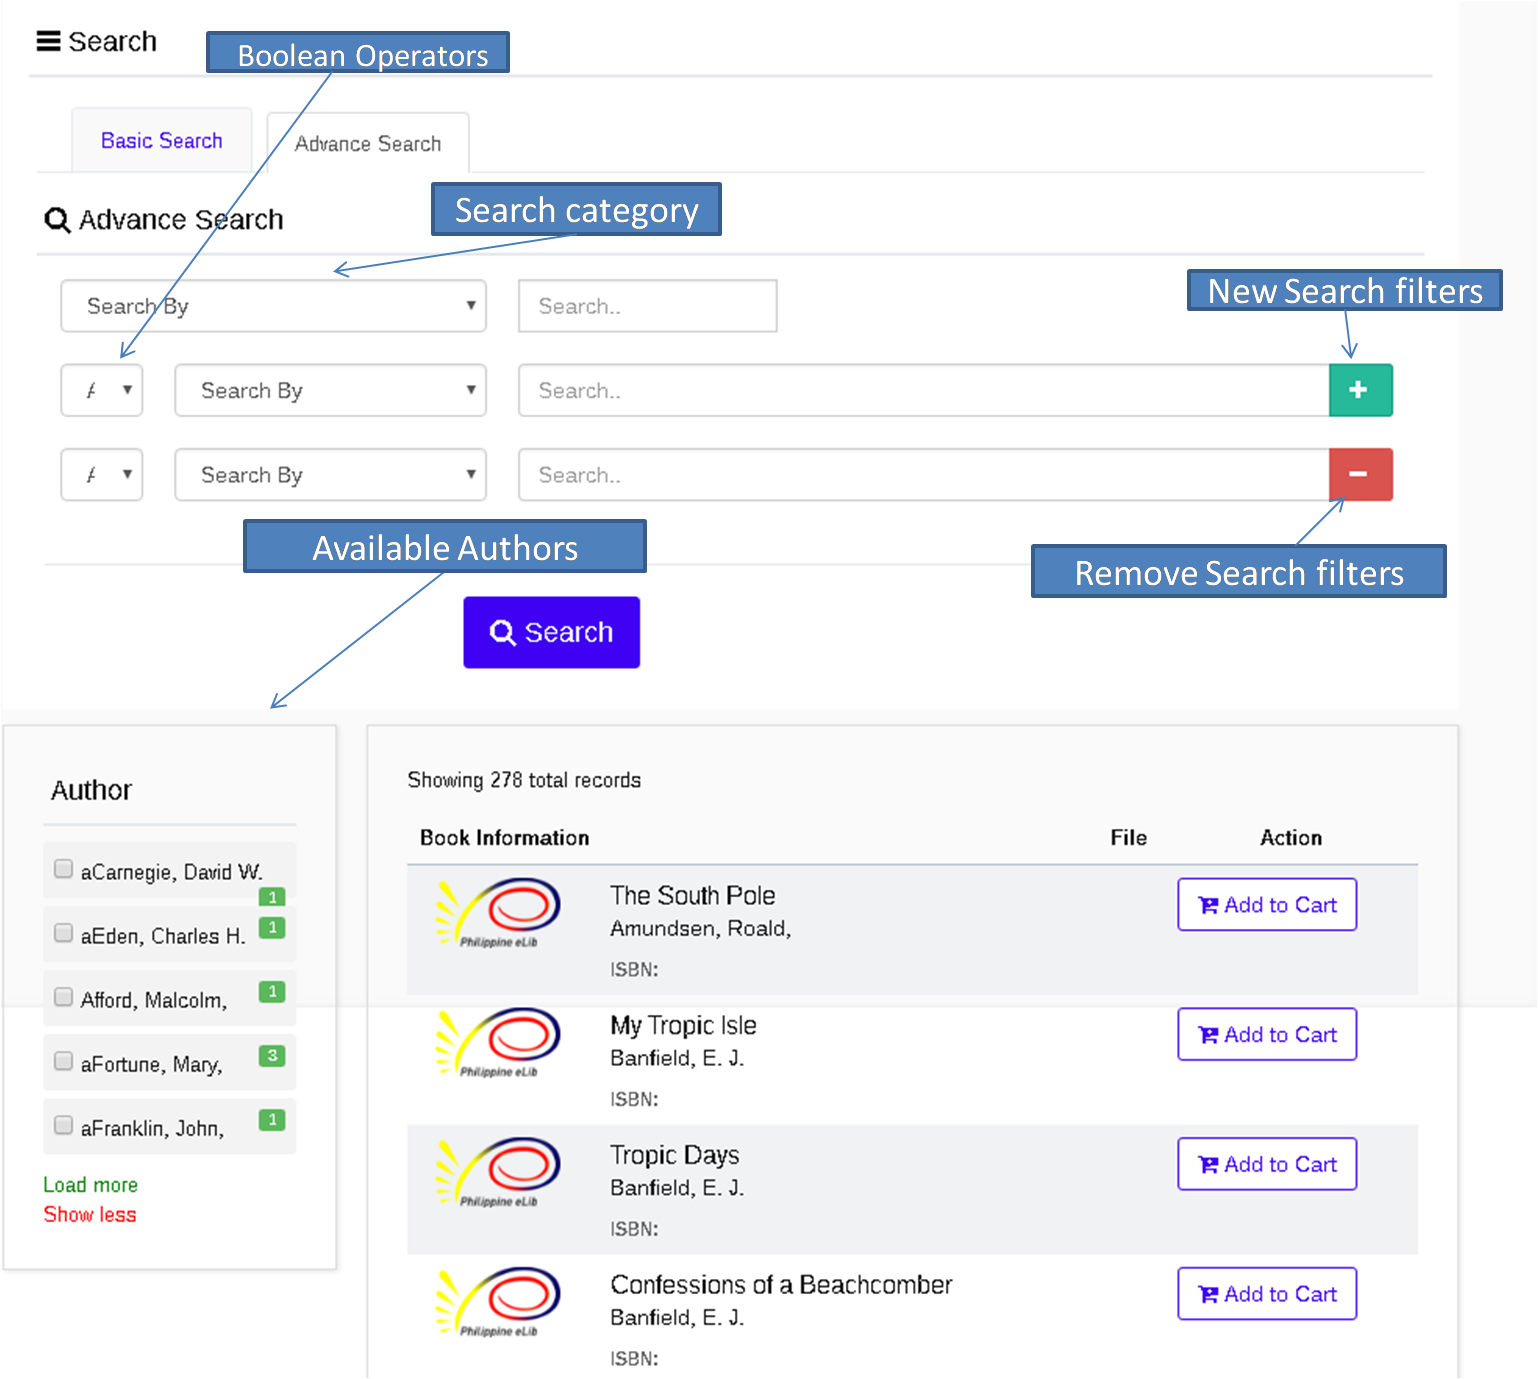
- To use the advanced search, proceed with the following steps:
- Click advance search
- Choose from the search category depending on the information that will be entered into the search bar.
- Enter the information the search bar
- Click the “boolean operators button” and choose from “and”,“or”,“not” to specify results that will be shown.
- choose from search category depending on the information that will be entered into the search bar.
- click “Search button”
Users can add more search filters by clicking the “add button” and another search filter will be shown. However if a search filter is not needed anymore, the user can click the “Subtract button” and the filter will disappear.
4.3 Book Cart
4.3.1 Adding Books to Cart
- Adding books to cart can be done by clicking the “Add to Cart button”
- Users can view the available books by clicking “Search” on the sidebar menu. Records/Books are shown and users can navigate by –clicking the next or previous button.
- Users can also add the books that they want by searching for the book in the Search page.
4.3.2 Removing Books from Cart
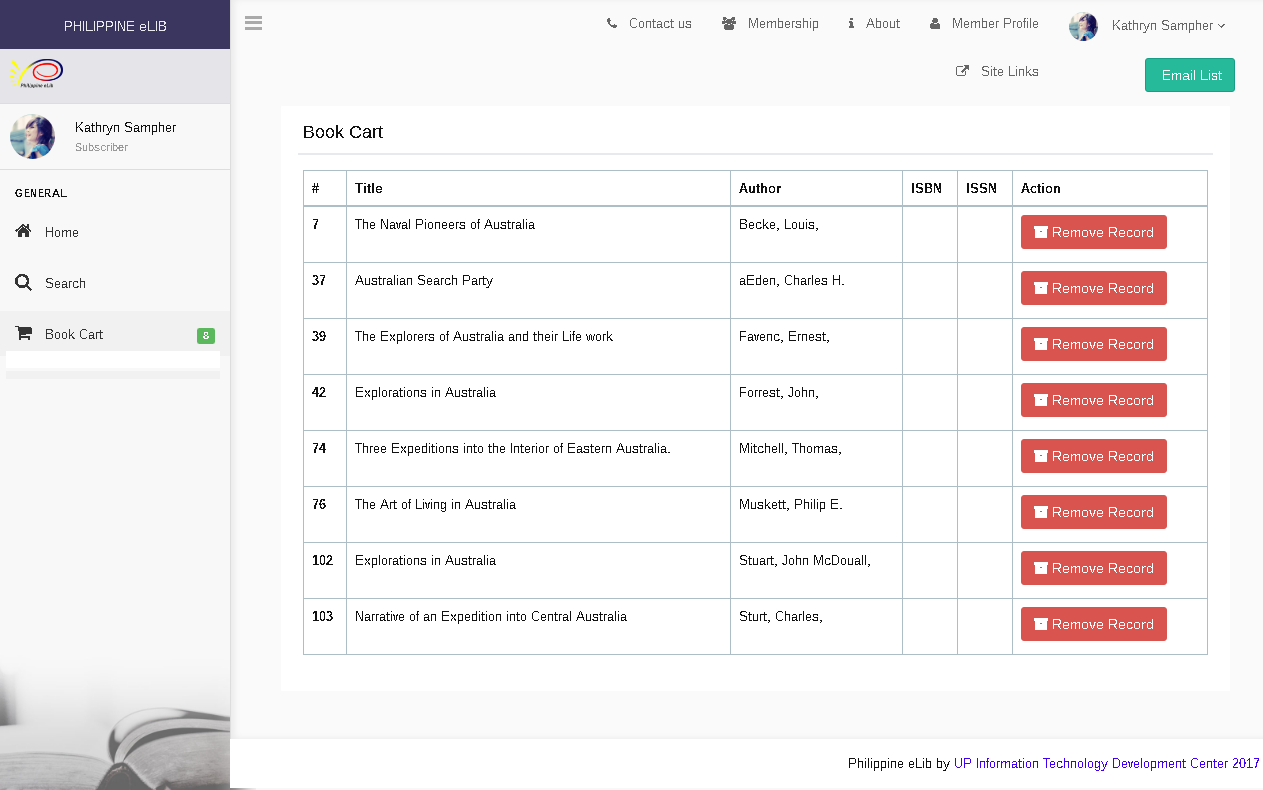
- Proceed to the book cart by clicking “Book cart” in the Sidebar menu.
- In the list of books, Users can click the “Remove Record button” in the list.
- Users will be asked once to proceed with the removal of records. The user can click “Yes” to proceed with the removal of records and click “Cancel button” to cancel the deletion of records.
4.3.3 Email Book Cart List
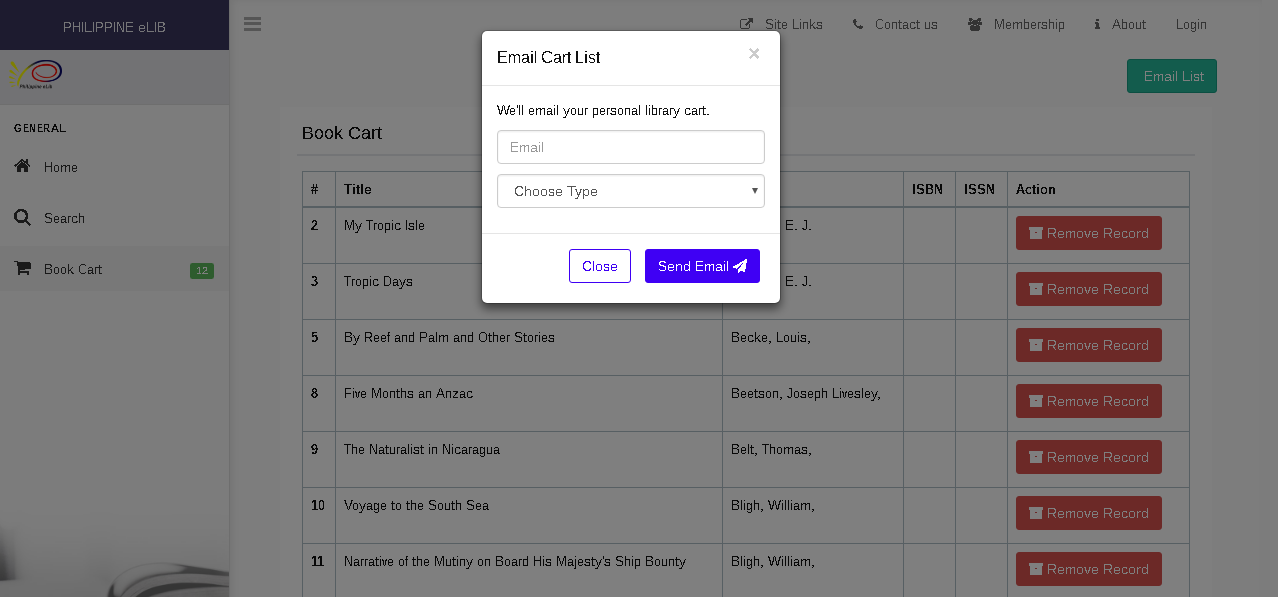
- The user must click on “Email List button” and the user will be prompted to enter Email Address.
- Enter Email address
- Choose from APA and MLA
- Click “Send Email button” to proceed and “Cancel button” to cancel the sending of email.
=== 4.4 Records Management
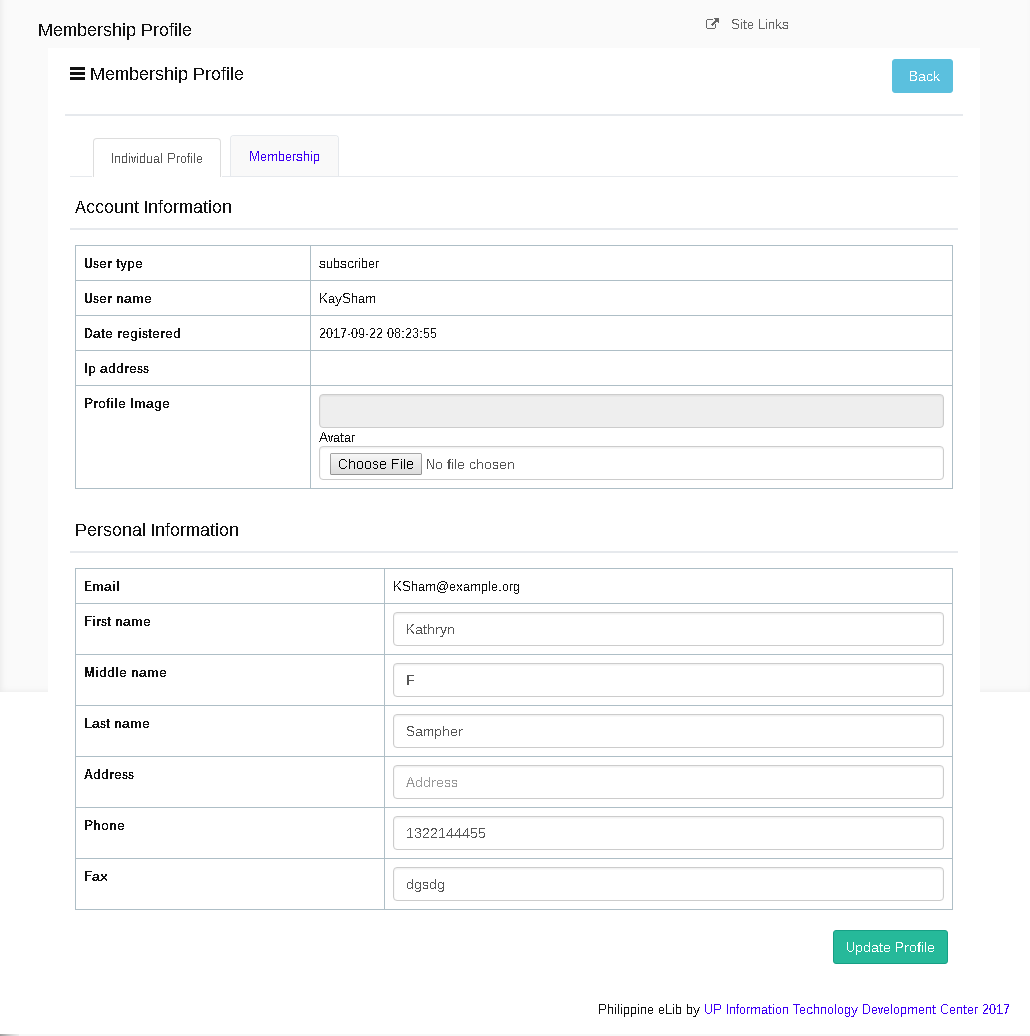
4.5 Member Profile
This page allows the user to edit personal information and view their membership profile.
4.5.1 Individual Profile
- To proceed to this page,the user must click on “Member Profile” or click on their username and click “Member Profile”, and the user will be directed to Individual profile page
- The user can change image through uploading a file and the user can also edit the personal information for changes and corrections.
4.5.1.1 Uploading Image
- Click “choose file button” and an image folder will be shown. The user must proceed to the folder where the picture is located.
- Click the image once and click open.
- Click “Update Profile button” once all the changes are ready to be saved.
4.5.1.2 Editing Personal Information
- Users can edit personal information by clicking at the textbox of the information shown.
- Once all the editing is done, Click on “Update Profile button”.

